Guide: Geo Targeting with TrafficJunky’s Geotargeting Features

Optimize your campaigns with TrafficJunky's updated geotargeting features.

TrafficJunky’s Geo Targeting allows advertisers to place their ads in front of the right audiences – target up to 10 specific regions or cities.

Create a New Campaign with Geo Targeting

  1. Login to your TrafficJunky account and click Create New Account.
  2. Under Targeting is where you will find Geo Targeting.

    Place your ads in front of the right audiences with TrafficJunky's Geo Targeting feature. Target up to 10 specific regions or citires!
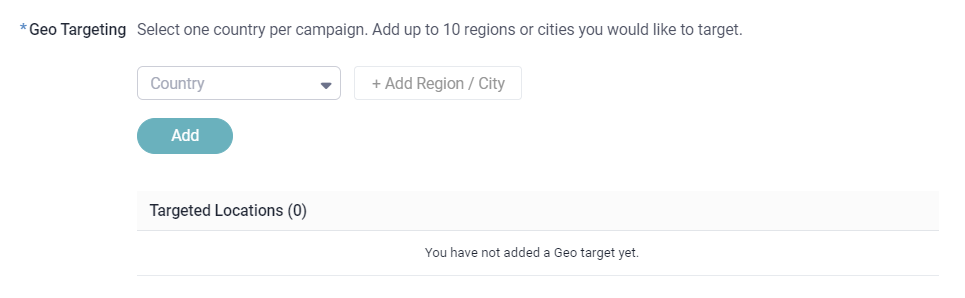
  3. Click on the Country field and type out the country you want to target or scroll to find it in the drop down.

    Geo Targeting Canada with TrafficJunky
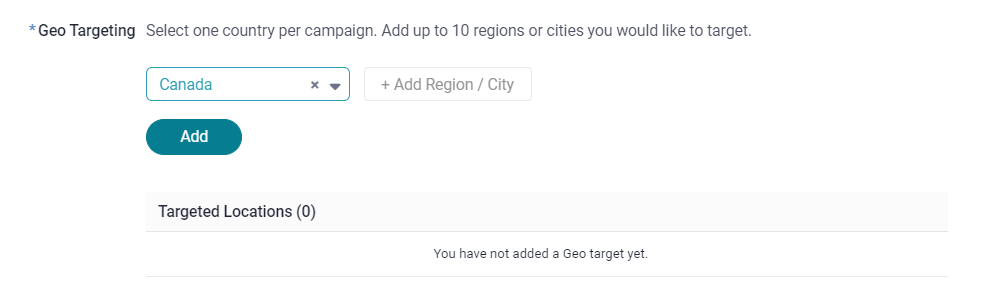
  4. Once you select the target country, you can add up to 10 regions or cities to target.
  5. Once you add a specific city and region to the target list, you will be able to toggle between include or exclude.

    TrafficJunky's Geo Targeting let's you include or exclude specific regions or cities.

Resources

Curious about other ways to target your audience?

Public Segment Targeting will allow you to target audiences by Income and Neighborhood. You’ll be able to identify which audience is the most receptive to your messaging and which converts best based on their neighborhood type and median income!
When creating campaigns on TrafficJunky, you have powerful targeting features at your disposal. One of the said features is the Zip / Postal code targeting feature. 

Let’s look at how this feature can help you set up clear-cut campaigns and give you that granular effect in your targeting.

As always, do not hesitate to reach out to TrafficJunky Support.

Leave a Reply